


Step 1. Bracket Installation
Before installing, review the chart below to confirm the correct # of brackets per blind.
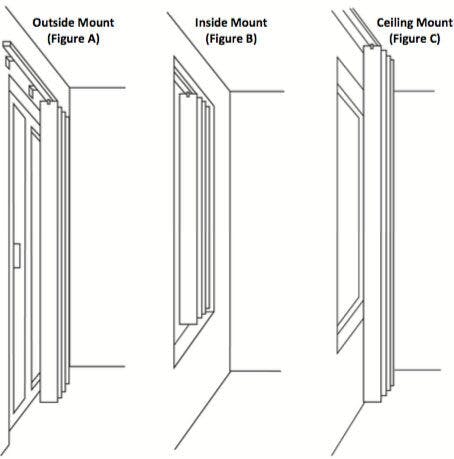
Outside Mount (Figure A)

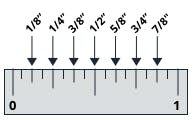
Standard wall mount installation brackets are adjustable and provide 1/2" to 1 1/2" wall clearance. Determine the height for the top of the bracket (measured from the floor) by adding 1/2" to the blind height including the headrail. When installed, louvers will clear the floor by 1/2".
Place the first bracket directly over the corner of the window with a maximum space of 30" between brackets. Adjust the bracket so the louvers clear all obstructions.
Inside Mount (Figure B or C)
Note: For inside mount, the valance must be installed first (see below)
Use mounting clips to secure headrail on ceiling or inside mounts. The center of the mounting clips align with the center of the louver carrier stem. Position the screws a minimum of 2 1/4" in front of the window frame or any projection.
Set mounting clips with a maximum space of 30" apart from each other. Allow a minimum of 1/2" clearance above sill or carpet.
Use the following # of Installation Brackets based on the Blind Width:
- Up to 60" - 2
- 60 1/8" to 84" - 3
- 84 1/8" to 108" - 4
- 108 1/8" to 132" - 5
- 132 1/8" to 156" - 6
- 156 1/8" to 180" - 7
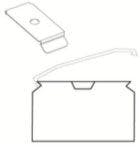
Step 2. Headrail Installation
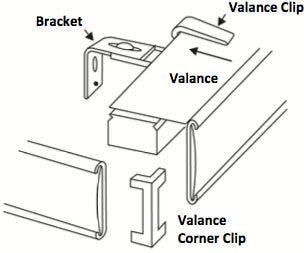
Mount the installation brackets on the headrail then snap in place, as shown below. To remove headrail, simply push the release lip up with a screwdriver.

Step 3. Louver Installation
Push the louver up into the carrier stem, then pull slightly straight down to lock in place.
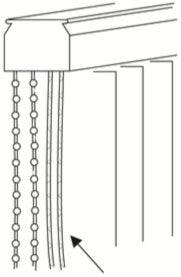
Step 4. Test Rotation
Pull the metal bead chain once in each direction, rotating the louvers from front to back. This step will align all of the louvers.

Step 5. Test Traverse
Alternatively pull the nylon cords to ensure that the blind traverses smoothly in both directions.
Caution: Do not traverse the blind with the louvers in the closed position.
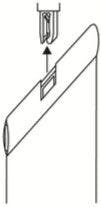
Step 6. Valance Installation
For inside or ceiling mounts, install the headrail bracket clip mounting screw through the valance as shown. Make sure louvers do not touch the valance.
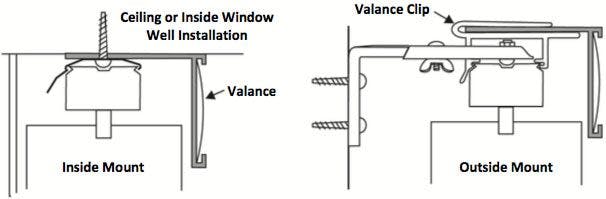
For outside mounts, a plastic valance clip is provided. Snap the valance clips onto the aluminum headrail. Then, slide the top dust cover of the valance into the plastic valance clips until they lock in place.
Before installing, review the chart below to confirm the correct # of valance clips per blind.
For Outside Mount Installations, use the following # of Valance Clips based on the Blind Width:
- Up to 60" - 2
- 60 1/8" to 84" - 3
- 84 1/8" to 108" - 4
- 108 1/8" to 132" - 5
- 132 1/8" to 156" - 6
- 156 1/8" to 180" - 7
Valance Returns
Valances are available with Square Snap in Corner Returns or Round Corner Returns. Returns for Round Corner Valances will come preassembled. For Square Corner Valance Returns, slide the clear plastic corner clip onto the top edge of the valance. Then slide the valance return into the other side of the corner clip as shown. Valance returns may be trimmed to fit if necessary with heavy duty scissors.
Operating Instructions
Cord & Chain Control
To rotate the louvers, gently pull the nickel plated metal bead chain. To traverse the louvers, gently pull on the nylon cord. For proper traversing of the louvers, it is critical that the louvers be rotated to the open position prior to pulling on the cord to draw the louvers across the window opening.
If louvers become tangled or have moved out of alignment with use, re-adjustment is simple. With your hand, gently adjust the louvers so they are all facing the same direction. Make certain that the louvers are overlapping each other in the correct direction. Pull the metal bead chain until you hear a grinding sound. Give the chain an additional gentle pull. This grinding noise comes from the louver carriers re-aligning themselves. Now pull the chain in the opposite direction and all of the vanes will be aligned correctly.
Wand Control
To rotate the louvers, rotate the wand in the direction you want the louvers rotated. To traverse the louvers, rotate the louvers to the open position. Then, push or pull the wand to open (stack louvers) or close (unstack louvers) the blind. If louvers are installed with the front of the louver facing the wand, the wand will be in front of the louvers when the blind is rotated closed. If the louvers are installed with the back of the louver facing the wand, the wand will be in back of the louvers when the blind is rotated closed.